So I took the leap of faith, installed the LTS kernel, was able to find it in rEFInd (thanks @PalynDrumatiX for pointing me in the right direction) et voilá:
╭ Keys ──────╮╭ Values ─────────────────────────────────╮
│ Host        ││ MasterComputer                          │
│ Machine     ││ MS-7E26  1.0                            │
│ OS          ││ CachyOS   [vrolling] [x86_64]           │
│ Kernel      ││ Linux  [v6.12.43-2-cachyos-lts]         │
│ Running     ││ 83 days                                 │
╰───────────╯╰─────────────────────────────────────────╯
That was easier than expected.
Update: An LTS kernel as fallback is now part of the regular CachyOS installation! ![]()
![]()
![]()
I will keep this tutorial for reference, but it might not be necessary any longer:
-
Use Cachy Kernel Manager to select another kernel. Keep your current kernel selected, too.
-
Click “Execute” and wait until the process is finished
-
Reboot
-
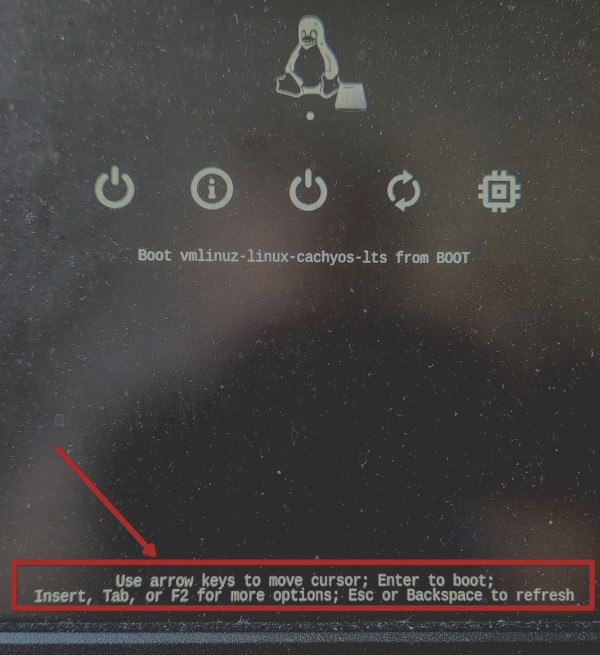
In rEFIND, select the right operating system with arrow keys (please excuse the dusty screen):
-
Then press TAB to enter the advanced settings:
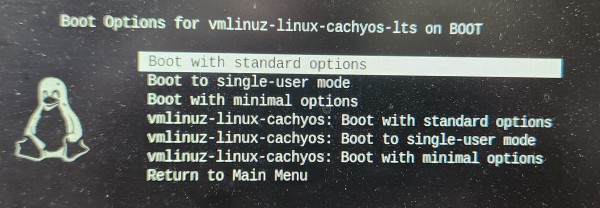
Here, you can select the different existing kernels
- Press ENTER and boot into the selected kernel
- Done.
Refind always boots into the “latest” kernel by timestamp, so if you want to boot into another kernel you could just update its timestamp with
sudo touch /boot/vmlinuz-name-of-your-kernel
THREAD CAN BE CLOSED. THANKS TO EVERYONE HELPING OUT HERE!